Did you decide to purchase NordVPN? Do you wonder: How To Get NordVPN On Ubuiquity?
In this article we will show you step by step how to make a purchase of new NordVPN subscription, set up account and start using NordVPN software! After guide we will answer some questions regarding using an VPN app.
Table of Contents
Here is how to purchase a NordVPN subscription
- Start by visiting NordVPN website, you can click here.
- Click on pricing tab at the top of the page, here you can see current plans, pricing and deals. Choose which NordVPN plan you prefer to purchase and then click “Get *name of the plan* button.
Click here to get -65% NordVPN Deal!
You can choose between standard plan (pure NordVPN service) or other plans that comes with NordPass or NordLocker services.
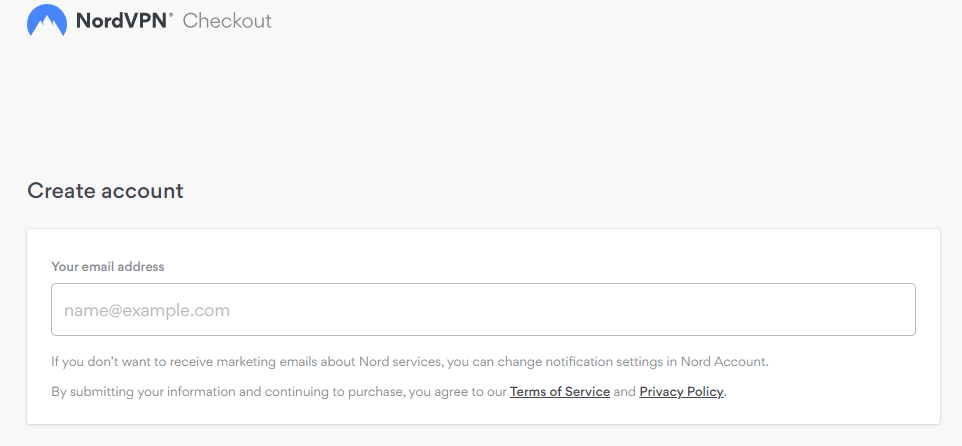
- Now you have to type your email adress that you will be using NordVPN with.
- Now you have to choose payment method which you want to use, and proceed with it.
- Well done! If you followed this guide nicely you purchased NordVPN subscription! Look at your email inbox, here you will find purchase confirmation email.
Now download NordVPN APP and start using it
After purchasing your VPN plan, head to this page to download the NordVPN app
Now you can click start and enjoy using VPN!
Click here to get -65% NordVPN Deal!
Let’s get back to answering your questions:
First, make sure that you have a NordVPN account and are logged in. Then, open the Plex Media Server application. In the left sidebar, click on the little gear icon to open Settings.
Under General, look for Remote Access. Click the button that says Manually specify public port. In the Port field that appears, type in 8888 (or any other port number between 1024-65535 that isn’t already being used).
Next, still under General in Plex settings, find Network Security. Check the box that says Require SSL for all remote connections. This is important! If you don’t do this step, your server could be hacked very easily.
Now go back to NordVPN and open up your app. Click on Settings in the left sidebar and then head to Advanced Settings at the bottom of the list. Enable Port Forwarding by clicking the switch next to it so it turns green; then click on OK at the bottom right of the window to save your changes.
Finally, connect to any NordVPN server location. Once you’re connected, go back to Plex settings (under Remote Access) and click Test Connection at the bottom of the page. It should say “Success!” Congrats, you’ve now set up a secure connection betweenPlex and NordVPN!
Worth knowing
1. Make sure that the VPN service you’re using allows for port forwarding. This is necessary in order for Plex traffic to be routed correctly.
2. Forward the following ports on your router: 32400 (TCP), 3005 (UDP), 8324 (UDP). You’ll need to consult your router’s documentation on how to do this; each router is different.
3. Add the IP address of your computer running Plex Media Server into the “Allowed IP Addresses” field under Settings -> Server -> Network in the Plex Web app. The easiest way to find your computer’s IP address is by going into System Preferences -> Network and looking under the “Status” heading.
4. Restart the Plex Media Server process on your computer if necessary for changes to take effect; depending on your setup, this may not be necessary. That’s it! Your Plex Media Server should now be accessible from outside your network without issue, even when using a VPN connection
Worth knowing
Next, you will need to purchase a VPN plan. Astrill offers two different VPN plans: Pro and Elite. Pro is $9.95 per month and Elite is $19.95 per month. If you want to save money, we recommend purchasing the yearly plan for either Pro ($99.95) or Elite ($199.95).
Once you have purchased a VPN plan, you can activate it by clicking on the “Activate” button in the Astrill app. After that, simply connect to a server located in China and start browsing!
Worth knowing
There are a few ways to get around this issue. The first is to use a VPN that supports port forwarding. Port forwarding allows you to route specific traffic through your VPN connection, and qBittorrent can be configured to use a specific port. This method is the most reliable, but it requires some extra configuration on both your VPN and qBittorrent.
The second method is to use an alternative protocol for communication with the tracker, such as uTP or I2P. These protocols are designed to be more resistant to snooping, and don’t require port forwarding. However, they might not work with all trackers, and they tend to be slower than traditional protocols like HTTP or UDP.
The third method is to connect to your VPN using OpenVPN over SSH tunneling. This encrypts all of your traffic, including tracker GET requests, so it can’t be monitored by your ISP or anyone else sniffing your traffic. It’s also fairly easy to set up, though it will slow down your connection somewhat compared to other methods.
Whichever method you choose, make sure you test it before relying on it too heavily!
![Does NordVPN Change Your Ip On Forums? [NordVPN Beginner Guide]](wp-content/themes/blogstream/img/thumb-medium.png)